Instructions
- In a large mixing bowl, whisk together the all-purpose flour, baking powder, and salt. Make sure these dry ingredients are well combined to ensure even leavening.
- Create a well in the center of the dry ingredients. Pour in the warm water and 2 tablespoons of olive oil.
- Using a wooden spoon or your hands, gradually mix the wet ingredients into the dry ingredients until a shaggy dough forms.
- Turn the dough out onto a lightly floured surface. Knead the dough for 5-7 minutes, or until it becomes smooth and elastic. The dough should feel soft and pliable, not sticky. If it’s too sticky, add a tiny bit more flour; if it’s too dry, add a few drops of water.
- Form the dough into a ball. Lightly grease the mixing bowl with a little olive oil, place the dough ball back in, and turn it to coat. Cover the bowl with a clean kitchen towel or plastic wrap. Let the dough rest at room temperature for at least 30 minutes. This resting period allows the gluten to relax, making the dough easier to roll out.
- While the dough is resting, prepare the cheese filling. In a medium bowl, combine the shredded mozzarella cheese and shredded cheddar cheese. If desired, stir in the optional garlic powder and black pepper for extra flavor.
- After the dough has rested, divide it into 4 equal portions. Each portion will make one cheese bread.
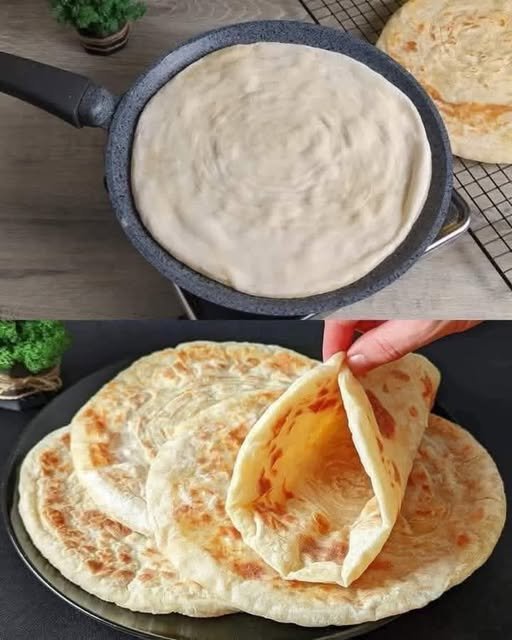
- Take one portion of dough and, on a lightly floured surface, roll it out into a thin circle, about 8-9 inches in diameter. Aim for a thickness of about 1/8 inch. The thinner you roll it, the flakier the final bread will be.
- Spoon about 1/4 of the cheese mixture onto the center of the rolled-out dough, leaving a 1-inch border around the edges.
- Carefully gather the edges of the dough and bring them towards the center, encasing the cheese completely. Pinch the seams firmly to seal the dough, forming a ball. Ensure there are no gaps where the cheese can escape during cooking.
- Gently flatten the sealed dough ball with your palm. Then, using a rolling pin, carefully roll the dough back out into a circle, about 6-7 inches in diameter. Be gentle to avoid tearing the dough and letting the cheese escape. If a little cheese peeks through, don’t worry too much; it will just get crispy.
- Repeat steps 7-11 with the remaining three portions of dough and cheese filling.
- Heat a large, non-stick skillet or cast-iron pan over medium heat. Add about 1-2 teaspoons of olive oil to the pan. Swirl to coat the bottom evenly.
- Once the oil is shimmering, carefully place one cheese bread into the hot pan. Cook for 3-5 minutes per side, or until golden brown and puffed up, with crispy edges. You might see some cheese bubbling out, which is perfectly normal and delicious!
- Flip the bread gently with a spatula and cook the other side until it’s also golden brown and cooked through.
- Remove the cooked cheese bread from the pan and place it on a plate. You can keep it warm by covering it loosely with foil while you cook the remaining breads.
- Add more olive oil to the pan as needed before cooking each subsequent cheese bread.
- Serve the cheese bread warm, cut into wedges, and enjoy immediately.
Cooking Tips and Variations
To achieve the perfect flaky texture, pay close attention to the dough consistency. It should be soft and elastic, not too stiff or too sticky. If your dough is fighting you while rolling, let it rest for another 10-15 minutes. This extra rest allows the gluten to relax, making it much easier to roll out thinly without it springing back. When rolling out the cheese-filled dough, be gentle but firm. The goal is to get it thin enough for flakiness without tearing the dough and losing all that precious cheese. A light dusting of flour on your rolling pin and surface will prevent sticking.
For variations, don’t be afraid to experiment with your cheese choices! A blend of Monterey Jack and a sharp cheddar offers a wonderful flavor profile, or you could add a touch of smoked gouda for a deeper, more complex taste. For a spicy kick, mix in a pinch of red pepper flakes with your cheese. You can also incorporate finely chopped herbs like chives or parsley for freshness. If you want to make it heartier, consider adding a tablespoon of finely chopped cooked ham or crumbled cooked bacon to the cheese filling. For a vegan version, use plant-based shredded cheese and substitute the olive oil with a neutral-flavored vegetable oil. The dough itself is naturally dairy-free, so the only substitution needed is the cheese.
Another tip for perfectly cooked bread is to manage your pan temperature. Medium heat is key – too high, and the outside will burn before the inside cooks through and the cheese melts; too low, and the bread will absorb too much oil and become greasy. Keep an eye on the browning; a beautiful golden-brown crust is what you’re aiming for. Don’t overcrowd the pan; cook one or two breads at a time, depending on your skillet size, to maintain consistent heat. This ensures even cooking and browning for each piece.
Storage and Reheating
This cheese bread is undoubtedly best enjoyed fresh and warm, straight from the pan. However, if you happen to have any leftovers (a rare occurrence in my house!), they can be stored and reheated. To store, allow the cooked cheese bread to cool completely to room temperature. Once cooled, place the breads in an airtight container or a resealable plastic bag. They will keep well in the refrigerator for up to 3 days. For longer storage, you can freeze them. Wrap each cooled cheese bread individually in plastic wrap, then place them in a freezer-safe bag or container. They can be frozen for up to 1 month. Thaw frozen cheese bread in the refrigerator overnight before reheating.
When it comes to reheating, the goal is to bring back that delightful crispness without drying out the bread or making the cheese rubbery. The best method for reheating is in a skillet. Heat a non-stick pan over medium-low heat. Place the cheese bread directly into the dry pan (no need for additional oil unless you want extra crispiness). Heat for 2-3 minutes per side, or until it’s warmed through and the exterior has regained some of its crispness. The cheese should be melty again. If reheating from frozen (after thawing), you might need an extra minute or two per side. You can also reheat them in a toaster oven or a conventional oven. For an oven, preheat to 350°F (175°C). Place the cheese bread directly on a baking sheet and heat for 5-7 minutes, or until warm and slightly crispy. Avoid reheating in the microwave, as it tends to make the bread soft and chewy rather than crispy, and the cheese can become rubbery.
Frequently Asked Questions
Can I make the dough ahead of time?
Yes, absolutely! You can prepare the dough up to 24 hours in advance. After kneading, place the dough ball in a lightly oiled bowl, cover it tightly with plastic wrap, and refrigerate. When you’re ready to use it, take the dough out of the refrigerator about 30-60 minutes before you plan to roll it out to allow it to come closer to room temperature, which makes it easier to work with. Then proceed with dividing, filling, and cooking as per the instructions.
What kind of cheese is best for this bread?
The best cheeses are those that melt well and have good flavor. I typically use a blend of low-moisture mozzarella and cheddar for their excellent melt and classic taste. Other great options include Monterey Jack, Provolone, or even a mild Colby. For a tangier flavor, you could incorporate a small amount of crumbled feta or goat cheese, but ensure it’s mixed with a good melting cheese to hold it all together. Avoid very dry, crumbly cheeses that won’t melt smoothly.
My cheese bread isn’t getting crispy. What am I doing wrong?
There are a few factors that contribute to crispiness. Firstly, ensure your pan is hot enough (medium heat) before adding the bread. If the pan isn’t hot enough, the bread will absorb too much oil and steam rather than brown. Secondly, don’t use too much oil in the pan; just enough to lightly coat the bottom. Excessive oil can lead to a greasy rather than crispy exterior. Finally, give it enough time to cook on each side. Resist the urge to flip too early. Let it develop a nice golden-brown crust before turning.
Can I bake this cheese bread instead of pan-frying it?
While the pan-frying method is what gives this bread its signature flaky, crispy exterior, you could certainly bake it for a different texture. If baking, preheat your oven to 400°F (200°C). Place the rolled and filled cheese breads on a baking sheet lined with parchment paper. Brush the tops lightly with a little olive oil or melted butter. Bake for 12-18 minutes, or until golden brown and cooked through. The texture will be softer and less crispy than the pan-fried version, but still delicious.