Instructions
- Prepare the Cream Cheese: Ensure your cream cheese is at room temperature. This is crucial for a smooth, lump-free cheese ball. If it’s still cold, you can soften it more quickly by unwrapping it and microwaving it on high for
15-20 seconds. - Combine Wet Ingredients: In a large mixing bowl, using an electric mixer (handheld or stand mixer with paddle attachment), beat the softened cream cheese until light and fluffy, about 1-2 minutes.
- Add Peanut Butter: Scrape down the sides of the bowl. Add the creamy peanut butter to the cream cheese and beat until fully incorporated and smooth. This may take another 1-2 minutes.
- Sweeten the Mixture: Gradually add the sifted powdered sugar and the granulated sugar to the cream cheese and peanut butter mixture. Start on a low speed to prevent the sugar from flying out of the bowl, then increase to medium
speed and beat until fully combined and smooth. - Add Vanilla: Stir in the vanilla extract until just combined. Do not overmix.
- Incorporate Internal Fillings (Optional): If you want to add some chopped Reese’s Peanut Butter Cups or mini chocolate chips directly into the mixture for an extra surprise inside, gently fold in about 1/4 to 1/2 cup of them
at this stage. - Form the Ball: Scrape the mixture out of the bowl onto a large piece of plastic wrap or parchment paper. Using the plastic wrap or parchment paper to help guide you, shape the mixture into a firm, round ball. Try to make it
as smooth and even as possible. - Chill the Ball: Wrap the cheese ball tightly in the plastic wrap or parchment paper. Place it in the refrigerator to chill for at least 2-4 hours, or preferably overnight. This step is essential for the cheese ball to firm up
and hold its shape, making it easier to coat and serve. - Prepare the Coating: While the cheese ball is chilling, prepare your coating ingredients. Chop the Reese’s Peanut Butter Cups into small, irregular pieces. You can do this by hand or pulse them briefly in a food processor. Crush or
chop the Reese’s Pieces. You can place them in a Ziploc bag and gently crush them with a rolling pin or the bottom of a heavy pan. - Combine Coating Ingredients: On a shallow plate or in a wide bowl, combine the chopped Reese’s Peanut Butter Cups, crushed Reese’s Pieces, and optional mini chocolate chips. Mix them together well to create an even coating
mixture. - Coat the Cheese Ball: Once the cheese ball is thoroughly chilled and firm, unwrap it. Carefully roll the cheese ball in the prepared coating mixture, pressing the candy pieces gently into the surface until it is completely
covered. You may need to press firmly to ensure the candy adheres well. - Final Chill (Optional): For best results, you can place the coated cheese ball back in the refrigerator for another 30 minutes to an hour to help the coating set.
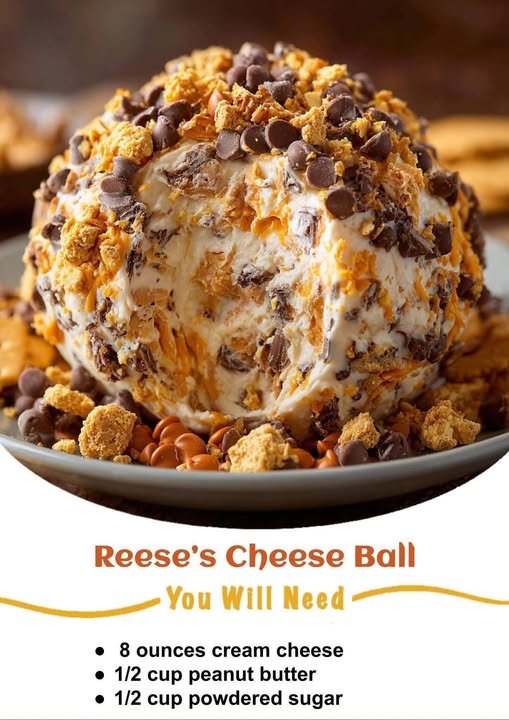
- Serve: Transfer the Reese’s Cheese Ball to a serving platter. Serve immediately with your favorite dippers.
Cooking Tips and Variations
To achieve the perfect Reese’s Cheese Ball, starting with room temperature cream cheese is paramount. Cold cream cheese will result in a lumpy mixture that’s difficult to smooth out, making it harder to form a cohesive ball. If you forget to
take it out in advance, a quick 15-20 second zap in the microwave (unwrapped!) can help. When mixing, avoid overbeating once the ingredients are just combined; too much air can make the cheese ball less dense and more prone to softening quickly.
Sifting your powdered sugar is another small but mighty tip; it eliminates lumps and ensures a silky-smooth texture in your cheese ball. And don’t skimp on the chilling time! A minimum of 2-4 hours, or ideally overnight, allows the flavors to meld and the cheese ball to firm up properly, making it much easier to handle and coat. A well-chilled ball will also hold its shape better during serving.
For variations, the possibilities are as endless as your sweet tooth! While Reese’s is the star, you can experiment with different chocolate candies. Try substituting some of the Reese’s Peanut Butter Cups with chopped Snickers bars for a
caramel-nut twist, or M&M’s for a burst of color and classic chocolate flavor. If you’re a dark chocolate fan, use dark chocolate chips in the coating or even fold some into the cheese ball mixture itself. For an extra crunch and texture contrast,
consider adding finely crushed pretzels to the cheese ball mixture or to the outer coating – the salty crunch perfectly complements the sweet and creamy base. A drizzle of melted chocolate or caramel sauce over the top just before serving can
also add an elegant touch and extra layer of flavor. Feeling adventurous? A pinch of sea salt mixed into the cheese ball or sprinkled over the top can really enhance the sweet and salty dynamic, elevating the flavors even further. You can also
divide the mixture and make smaller, individual cheese balls for easier serving at a party, coating each one separately. This is a fantastic way to offer portion control and a more personal dessert experience for your guests.
Storage and Reheating
Storing your Reese’s Cheese Ball properly is key to maintaining its freshness and deliciousness. Once prepared and coated, the cheese ball should be stored in an airtight container in the refrigerator. This prevents it from absorbing any
unwanted odors from other foods in the fridge and keeps it from drying out. When stored correctly, the Reese’s Cheese Ball will stay fresh for up to 5-7 days. It’s best enjoyed within the first few days for optimal texture and flavor, as the
candy coating can sometimes soften slightly over time.
When it comes to reheating, the good news is that this is a dessert that generally does not require reheating! It is designed to be served chilled or at cool room temperature. If you prefer it a little softer for easier spreading, you can take
it out of the refrigerator about 15-30 minutes before serving. This allows it to slightly soften, making it easier for guests to scoop with crackers or fruit. However, avoid leaving it out at room temperature for extended periods, especially in
warm environments, as the cream cheese and peanut butter base will become too soft and potentially separate or become greasy. If you have any leftovers after a party and it has been sitting out for a while, it’s best to return it to the fridge
promptly. If the cheese ball has been out for more than 2 hours in warm conditions, it’s generally recommended to discard it for food safety reasons. Always trust your senses; if it looks or smells off, it’s better to be safe than sorry. For
the best experience, plan to serve your Reese’s Cheese Ball at its freshest and keep it chilled until just before it’s ready to be devoured!
Frequently Asked Questions
Can I make the Reese’s Cheese Ball ahead of time?
Absolutely! This is one of the best features of the Reese’s Cheese Ball. You can prepare the cheese ball mixture, form it, and chill it for up to 2-3 days in advance. Just make sure it’s tightly wrapped in plastic wrap. On the day of serving,
simply unwrap it, roll it in the candy coating, and place it on your serving platter. This makes it a fantastic make-ahead option for parties and holidays, reducing your stress on the big day.
What are the best dippers for a Reese’s Cheese Ball?
The best dippers are those that offer a good contrast in texture or flavor. Classic options include graham crackers, vanilla wafers, or even shortbread cookies for a sweet pairing. For a salty crunch that perfectly complements the sweet and
creamy cheese ball, try pretzel crisps, mini pretzels, or even sturdy buttery crackers. Fruit slices like apples (especially Granny Smith for a tart contrast), bananas, or strawberries also make excellent, refreshing dippers. You can also serve it
with brownie bites or pieces of pound cake for an extra decadent treat.
Why did my cheese ball turn out too soft or too hard?
If your cheese ball is too soft, it likely didn’t chill long enough, or your cream cheese was too warm when you started. Ensure the cream cheese is softened but not melted. If it’s too hard, it might be over-chilled. Simply let it sit out at
room temperature for 15-30 minutes before serving to allow it to soften slightly to a more spreadable consistency. The consistency is key to a good cheese ball, so proper chilling and starting with correctly softened ingredients are crucial.