Instructions
- Prepare the bacon: Cook 4-6 strips of bacon until very crispy. This can be done in a skillet over medium heat, in the oven, or in an air fryer. Once cooked, transfer to a paper towel-lined plate to drain excess grease. Allow to cool completely, then crumble into small pieces. Set aside a small amount for garnish, if desired.
- Prepare the bananas: Peel and slice two ripe bananas. For the thickest, creamiest shake, freeze the banana slices for at least 2-3 hours, or overnight, before blending. If you’re short on time, fresh ripe bananas will also work, but the shake might be slightly less thick.
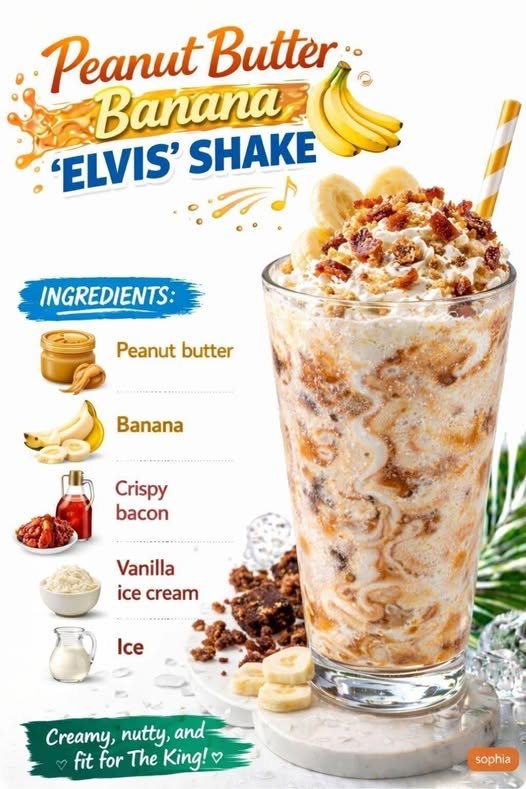
- Combine ingredients in blender: Add the frozen banana slices, creamy peanut butter, vanilla ice cream, and whole milk to a high-speed blender. If you prefer a thicker shake, you can also add 1/4 cup of ice cubes at this stage.
- Blend until smooth: Secure the lid on your blender and blend on high speed until the mixture is completely smooth and creamy. If the shake is too thick to blend, add a tablespoon or two more of milk at a time until it reaches your desired consistency. Be careful not to over-blend, as this can make the shake too thin.
- Add the bacon: Once the shake is smooth, add most of the crumbled crispy bacon to the blender. Pulse a few times, just enough to incorporate the bacon pieces without completely pulverizing them. You want to retain some texture.
- Pour and garnish: Pour the “Elvis” Shake into a tall glass or two smaller glasses.
- Garnish generously: Top with a generous swirl of whipped cream (if using). Sprinkle the reserved crumbled bacon over the whipped cream. For an extra touch, add a few fresh banana slices or a drizzle of honey or chocolate syrup.
- Serve immediately: This shake is best enjoyed right after blending to ensure optimal coldness, thickness, and flavor.
Cooking Tips and Variations
For the thickest, creamiest shake, always use frozen banana slices. This eliminates the need for too much ice, which can dilute the flavor.
Don’t skimp on the bacon! The crispy, salty bacon is a crucial element that provides a delightful textural contrast and balances the sweetness of the shake. Make sure it’s cooked very crispy so it crumbles easily.
Adjust the milk quantity to achieve your preferred consistency. Start with the recommended amount and add more in small increments if the shake is too thick to blend.
While vanilla ice cream is classic, feel free to experiment with other flavors like caramel swirl or even a touch of chocolate ice cream for a mocha-Elvis twist.
For a richer flavor, use full-fat whole milk. For a lighter version, you can use skim milk or a dairy-free alternative.
Try different types of peanut butter. Crunchy peanut butter will add even more texture, while natural peanut butter might offer a more intense peanut flavor.
Make it vegan: Substitute dairy ice cream with a plant-based vanilla ice cream (e.g., almond, coconut, or oat milk-based). Use a plant-based milk alternative and a vegan bacon substitute (e.g., tempeh bacon or mushroom bacon) for the crumbles.
Add a shot of espresso or cold brew concentrate for a “Morning Elvis” shake that combines breakfast flavors with caffeine.
A pinch of cinnamon or a dash of vanilla extract can enhance the overall flavor profile.
For an extra decadent presentation, drizzle the inside of your serving glass with melted chocolate or peanut butter before pouring in the shake.
If you don’t have a high-powered blender, ensure your bananas are very well-frozen and cut into smaller pieces to help with blending.
Storage and Reheating
This “Elvis” Shake is truly best enjoyed immediately after preparation. The texture and temperature are optimal when fresh, and the crispy bacon will soften over time if left in the shake.
If you do have leftovers, you can store the shake in an airtight container in the refrigerator for up to 1-2 hours. However, be aware that the shake will lose its initial thickness and the bacon crumbles will become soggy. It will also separate slightly. It will not have the same delightful consistency as when freshly made.
Reheating this shake is not recommended, as it will completely lose its milkshake texture and become a thin, unappetizing liquid. The ice cream will melt, and the ingredients will not emulsify back into a shake consistency.
If you find yourself with leftover shake, you could try pouring it into popsicle molds and freezing it for a fun, albeit different, frozen treat. This would offer a new way to enjoy the flavors, though it won’t be a shake.
To avoid waste, it’s best to make only as much as you plan to consume in one sitting. The recipe is quick enough that you can easily whip up a fresh batch whenever the craving strikes!
Frequently Asked Questions
Can I use fresh bananas instead of frozen?
Yes, you can use fresh, ripe bananas, but the shake will be less thick and creamy. For the best “milkshake” consistency, freezing the banana slices beforehand is highly recommended. If using fresh bananas, you might want to add a bit more ice to compensate for the lack of frozen fruit.
What kind of bacon is best for this shake?
Any standard pork bacon will work well. The key is to cook it until it’s very crispy, almost brittle, so it crumbles easily and provides a satisfying crunch. Avoid overly thick-cut bacon if you want fine crumbles, as thinner slices tend to get crispier faster.
Can I make this shake dairy-free or vegan?
Absolutely! To make it dairy-free, simply substitute the vanilla ice cream with your favorite plant-based vanilla ice cream (e.g., made from almond, coconut, or oat milk) and use a dairy-free milk alternative. For a fully vegan version, you would also need to use a plant-based bacon substitute, such as tempeh bacon or mushroom bacon, cooked until crispy.
How can I make the shake thicker or thinner?
To make the shake thicker, ensure your bananas are well-frozen, add more ice cream, or include a few extra ice cubes when blending. For a thinner shake, add a little more milk, one tablespoon at a time, until you reach your desired consistency. Be careful not to add too much liquid at once.