Instructions
- In a large mixing bowl, combine the all-purpose flour, instant dry yeast, granulated sugar (if using), and fine sea salt. Whisk them together thoroughly to ensure all dry ingredients are evenly distributed. This step is important even without kneading, as it helps prevent pockets of unmixed ingredients.
- Pour the warm water and 2 tablespoons of olive oil into the dry ingredients. Using a sturdy wooden spoon or a spatula, mix everything together until a shaggy, cohesive dough forms. It’s okay if there are still a few dry bits of flour; just ensure most of the flour is hydrated. Do not overmix; simply combine until no dry flour remains.
- Cover the bowl tightly with plastic wrap or a clean kitchen towel. Place the bowl in a warm spot in your kitchen and let the dough rest and rise for at least 1 hour, or until it has visibly doubled in size. The longer the rest (up to 2 hours), the more flavor will develop.
- Once the dough has risen, gently punch it down to release the air. Lightly dust your work surface with flour. Turn the dough out onto the floured surface. It will be quite soft and a bit sticky, which is perfectly normal.
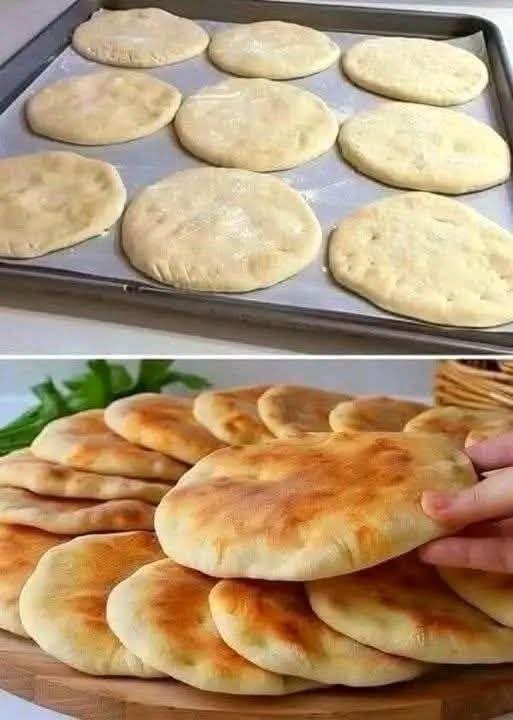
- Divide the dough into 8-10 equal pieces. You can do this by eye or use a kitchen scale for more precise portions, aiming for about 60-75g per piece.
- Take one piece of dough and gently shape it into a round ball. Then, using a floured rolling pin, roll it out into a thin, roughly circular or oval shape, about ¼ inch thick and 6-8 inches in diameter. Don’t worry about perfection; rustic shapes add to their charm! Repeat with the remaining dough pieces, dusting with flour as needed to prevent sticking.
- Preheat your oven to 450°F (230°C). If you have a pizza stone or a heavy baking steel, place it in the oven while it preheats. Otherwise, use a large baking sheet, lightly greased or lined with parchment paper.
- Carefully transfer 2-3 flatbreads to the preheated baking sheet or pizza stone, ensuring they are not overcrowded. Brush the tops of the flatbreads with a little extra olive oil.
- Bake for 5-8 minutes, or until the flatbreads are puffed up and have light golden-brown spots on the surface. The exact baking time may vary depending on your oven and the thickness of your flatbreads. Keep a close eye on them to prevent over-baking.
- Once baked, remove the flatbreads from the oven. If desired, you can brush them with a little more olive oil immediately after they come out of the oven for extra flavor and shine. Transfer them to a wire rack to cool slightly, or serve them warm straight away.
- Repeat the baking process with the remaining flatbreads until all are cooked. If using a baking sheet, you may need to do this in batches.
- Serve your homemade “No Kneading, No Eggs, No Butter!” flatbreads warm and enjoy their soft, chewy texture and delicious flavor!
Cooking Tips and Variations
Dough Consistency is Key: The dough should be soft and slightly sticky. If it’s too dry, add a tablespoon of water at a time. If it’s too wet and unmanageable, add a tablespoon of flour at a time. Resist the urge to add too much flour during the initial mixing, as this can make the flatbreads tough.
Warm Environment for Rising: For optimal rising, place the covered bowl in a warm, draft-free spot. A slightly warm oven (turned off, with just the light on) or near a sunny window works wonders. This helps the yeast activate properly and develop a light, airy texture.
Don’t Over-Roll: When shaping the flatbreads, aim for about ¼ inch thickness. Rolling them too thin can make them crispy like crackers, while too thick can result in a dense texture. A rustic, uneven shape is perfectly fine and adds to their charm.
Preheat Your Baking Surface: Whether you’re using a pizza stone, baking steel, or a regular baking sheet, preheating it in the oven ensures that the flatbreads hit a hot surface. This creates a quick burst of steam, leading to a better rise and a crispier exterior.
Don’t Crowd the Pan: Bake the flatbreads in batches to avoid overcrowding the baking sheet. Giving them space allows for even cooking and proper browning. Overcrowding can steam them rather than bake them, leading to a softer, less desirable texture.
Flavor Variations:
- Garlic Herb Flatbreads: Add 1 teaspoon garlic powder and 1-2 tablespoons dried Italian herbs (like oregano, basil, and thyme) to the dry ingredients. You can also brush with melted garlic butter (or olive oil infused with garlic) after baking.
- Spicy Kick: Incorporate ¼-½ teaspoon red pepper flakes into the dry ingredients for a subtle heat.
- Whole Wheat Option: For a heartier flatbread, substitute up to 1 cup of the all-purpose flour with whole wheat flour. You might need to add a touch more water as whole wheat flour absorbs more liquid.
- Sesame Seed Topping: Before baking, sprinkle the tops of the flatbreads with sesame seeds for added texture and a nutty flavor.
- Za’atar Delight: After baking, brush with olive oil and sprinkle generously with za’atar spice blend for an authentic Middle Eastern flavor.
Storage and Reheating
Storing Leftovers: Once completely cooled, store the flatbreads in an airtight container or a resealable plastic bag at room temperature for up to 2-3 days. For longer storage, you can refrigerate them for up to 5 days, though they may lose some of their softness.
Freezing for Later: These flatbreads freeze beautifully! Once completely cooled, stack them with a piece of parchment paper between each flatbread to prevent sticking. Place the stack in a freezer-safe bag or airtight container and freeze for up to 3 months. Thaw at room temperature before reheating.
Reheating Instructions:
- Oven: For the best results, preheat your oven to 350°F (175°C). Place the flatbreads directly on the oven rack or on a baking sheet and heat for 3-5 minutes, or until warmed through and slightly crisp.
- Toaster Oven: A toaster oven works perfectly for one or two flatbreads. Heat on a medium setting until warm.
- Skillet: Heat a dry skillet over medium heat. Place a flatbread in the skillet and warm for 1-2 minutes per side, until soft and pliable. This method can also help revive slightly stale flatbreads, giving them a bit of crispness.
- Microwave: While quick, the microwave can sometimes make flatbreads chewy. If using, heat for 10-20 seconds at a time, checking for warmth. Cover with a damp paper towel to help retain moisture.
Frequently Asked Questions
Can I make this dough ahead of time?
Absolutely! This dough is quite forgiving. After the initial rise, you can punch it down, cover the bowl tightly with plastic wrap, and refrigerate it for up to 24 hours. The cold temperature will slow down the yeast activity, allowing you to bake fresh flatbreads whenever you’re ready. Just allow the dough to come to room temperature for about 30 minutes before shaping and baking.
What kind of flour works best for this recipe?
All-purpose flour is ideal for these flatbreads, providing a good balance of chewiness and softness. You can experiment with substituting up to 1 cup of whole wheat flour for a nuttier flavor and added fiber, but be aware that you might need to adjust the water slightly as whole wheat flour absorbs more liquid. Bread flour can also be used for a chewier texture, but may result in a slightly denser flatbread.
My flatbreads aren’t puffing up in the oven. What went wrong?
There are a few common reasons why flatbreads might not puff:
- Yeast Activity: Ensure your yeast is fresh and active. If your water was too hot, it could have killed the yeast. If it was too cold, the yeast might not have activated enough.
- Dough Thickness: If the flatbreads are rolled too thin, they might not have enough structure to puff. If they are too thick, they might be too dense.
- Oven Temperature: A hot oven is crucial. If your oven isn’t hot enough, the steam won’t generate quickly enough to create the puff. Make sure your oven is fully preheated to the specified temperature.
- Over-working the Dough: While this is a no-knead recipe, over-handling the dough when shaping can deflate it. Be gentle!
Can I cook these flatbreads on a stovetop instead of baking?
Yes, you can! Heat a cast-iron skillet or a heavy-bottomed pan over medium-high heat. Once hot, place a rolled-out flatbread in the dry pan (no oil needed for cooking in the pan itself, though you can brush the flatbread with oil before cooking). Cook for 1-2 minutes per side, or until golden brown spots appear and the flatbreads are puffed and cooked through. This method often yields a slightly chewier texture with lovely char marks. Be sure to keep the heat consistent and adjust as needed to prevent burning.