Instructions
Part 1: Preparing the Chicken
- (Optional) Brine the Chicken: In a large bowl or container, combine cold water, salt, brown sugar, bay leaf, and black peppercorns. Stir until salt and sugar are dissolved. Add the chicken pieces, ensuring they are fully submerged. Cover and refrigerate for at least 4 hours, or preferably overnight.
- Prepare the Wet Mixture: In a large bowl, whisk together the eggs, buttermilk, and hot sauce (if using). If you brined the chicken, remove it from the brine, pat it thoroughly dry with paper towels, then transfer it to the buttermilk mixture. Ensure all pieces are well coated. Let sit for at least 30 minutes at room temperature, or refrigerate for up to 2 hours.
- Prepare the Dry Mixture: In another large shallow dish or bowl, combine the all-purpose flour, cornstarch, smoked paprika, garlic powder, onion powder, dried oregano, cayenne pepper (if using), salt, and black pepper. Whisk well to combine and ensure no lumps.
- Dredge the Chicken: Working with one piece of chicken at a time, remove it from the buttermilk mixture, allowing excess to drip off. Transfer it to the dry flour mixture. Press the flour mixture firmly onto the chicken, ensuring it’s completely coated. For extra crispiness, you can dip the coated chicken back into the buttermilk mixture briefly, then back into the flour mixture for a second coating. Place the coated chicken on a wire rack set over a baking sheet and let it rest for at least 15-20 minutes. This helps the coating adhere better and prevents it from falling off during frying.
Part 2: Preparing the Fries
- Cut the Potatoes: Wash the russet potatoes thoroughly. Peel them if desired, or leave the skin on for a more rustic look and added fiber. Cut each potato lengthwise into 1/2-inch thick planks, then cut each plank into 1/2-inch thick sticks. Aim for consistent size for even cooking.
- Soak the Potatoes: Place the cut potato sticks in a large bowl and cover them with cold water. Let them soak for at least 30 minutes, or up to 2 hours. This removes excess starch, which helps achieve maximum crispiness.
- Dry the Potatoes: Drain the soaked potatoes thoroughly. Spread them out in a single layer on clean kitchen towels or paper towels. Pat them as dry as possible. This is a crucial step for crispy fries; any residual water will make the oil splatter and prevent browning.
Part 3: Frying the Chicken and Fries (Double Frying Method)
- Heat the Oil: In a large, heavy-bottomed pot, Dutch oven, or deep fryer, pour 6-8 cups of vegetable, canola, or peanut oil. Heat the oil over medium-high heat until it reaches 325°F (160°C). Use a deep-fry thermometer to monitor the temperature accurately.
- First Fry for Fries: Carefully add a single layer of dried potato sticks to the hot oil, ensuring not to overcrowd the pot. Fry for 5-7 minutes, or until the fries are soft, cooked through, but not yet browned. They should be limp and pale yellow. Remove the fries with a slotted spoon or spider and transfer them to a wire rack set over a baking sheet to drain. Repeat with the remaining fries.
- First Fry for Chicken: Increase the oil temperature to 325°F (160°C). Carefully lower 2-3 pieces of coated chicken into the hot oil, again, do not overcrowd. Fry for 6-8 minutes, turning occasionally, until the coating is set and lightly golden. The chicken will not be fully cooked through yet. Remove the chicken from the oil and place it on a clean wire rack set over a baking sheet to drain. Repeat with the remaining chicken.
- Rest and Increase Temperature: Allow both the par-fried fries and chicken to rest for at least 10-15 minutes. This allows the internal temperature to equalize and prepares them for the second fry. While they rest, increase the oil temperature to 375°F (190°C).
- Second Fry for Fries (Crisping): Carefully return the par-fried fries to the hotter oil in batches. Fry for another 3-5 minutes, or until they are deeply golden brown and perfectly crispy. Remove from the oil and immediately transfer to a large bowl. Season generously with salt and garlic powder (if using) while hot. Toss to coat.
- Second Fry for Chicken (Crisping and Cooking Through): Carefully return the par-fried chicken pieces to the hotter oil in batches. Fry for an additional 8-12 minutes, or until the chicken is a deep golden brown, extra crispy, and cooked through. The internal temperature should reach 165°F (74°C) when tested with a meat thermometer in the thickest part of the chicken, avoiding the bone. Remove the chicken from the oil and place it on a clean wire rack set over a baking sheet to drain any excess oil.
Part 4: Preparing the Tangy Dipping Sauce
- Combine Ingredients: In a small bowl, whisk together the ketchup, apple cider vinegar, brown sugar, Worcestershire sauce, garlic powder, and black pepper until well combined and smooth.
- Taste and Adjust: Taste the sauce and adjust seasonings as needed. You might want a little more sugar for sweetness, or a dash more vinegar for tang.
Part 5: Assembly and Serving
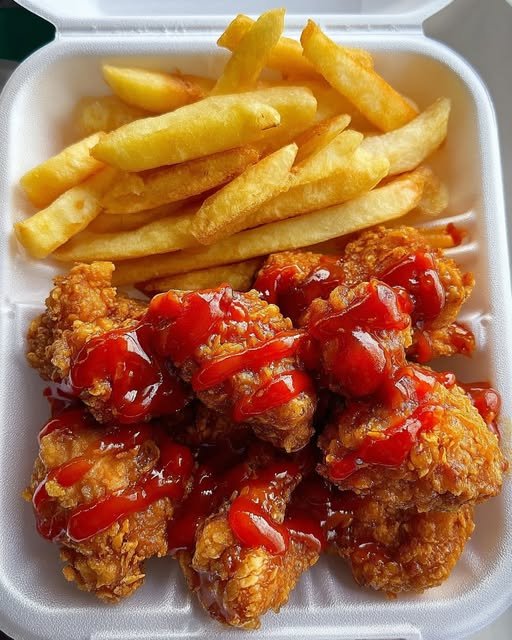
- Arrange the Box: Line your takeout box or serving platter with parchment paper or wax paper.
- Fill with Fries: Place a generous portion of the hot, seasoned fries on one side of the box.
- Add Chicken: Carefully arrange the crispy fried chicken pieces next to the fries.
- Drizzle Sauce: Drizzle some of the tangy dipping sauce directly over the chicken, or serve it on the side for dipping.
- Serve Immediately: Serve your Crispy Fried Chicken & Fries Box immediately for the best taste and texture.
Cooking Tips and Variations
- Oil Temperature is Key: Maintaining the correct oil temperature is paramount for crispy results. Too low, and your food will be greasy; too high, and it will burn on the outside before cooking through. Invest in a good deep-fry thermometer.
- Don’t Overcrowd the Pot: Frying in batches is essential. Overcrowding lowers the oil temperature dramatically, leading to soggy, oily results.
- Double Frying for Maximum Crispiness: The double-frying method used here (once at a lower temperature to cook through, once at a higher temperature to crisp) is the secret to truly crispy chicken and fries that stay crispy longer.
- Season Generously: Don’t be shy with seasoning, especially on the fries immediately after they come out of the oil. Salt adheres best to hot, freshly fried food.
- Rest the Chicken: Allowing the chicken to rest after both the buttermilk soak and after the first fry helps the coating adhere and allows the juices to redistribute for a juicier final product.
- Spice It Up: For a spicier kick, increase the cayenne pepper in the flour mixture, or add a pinch of chili powder. You can also add a dash of your favorite hot sauce to the buttermilk mixture.
- Herb Variations: Experiment with different herbs in your flour mixture. A touch of dried thyme, rosemary, or sage can add a unique flavor profile.
- Potato Varieties: While russets are ideal for fries, you can also use Yukon Golds for a slightly creamier interior. Sweet potatoes also make delicious fries, though they cook a bit faster.
- Alternative Sauces: While our tangy sauce is delicious, feel free to experiment! Classic options include honey mustard, BBQ sauce, ranch dressing, or a spicy sriracha mayo.
- Air Fryer Option (for a healthier twist): While not truly “fried,” you can achieve a crispy result in an air fryer. For the chicken, lightly spray the coated pieces with oil. Air fry at 375°F (190°C) for 20-25 minutes, flipping halfway, until golden and cooked through. For fries, soak and dry well, then toss with 1-2 tablespoons of oil. Air fry at 380°F (195°C) for 15-20 minutes, shaking the basket frequently, until golden and crispy.
Storage and Reheating
While crispy fried chicken and fries are best enjoyed immediately, leftovers can be stored and reheated, though they may lose some of their initial crispiness.
- Storage: Allow the fried chicken and fries to cool completely to room temperature. Store them in an airtight container in the refrigerator for up to 3-4 days. For best results, store chicken and fries separately to prevent the fries from becoming soggy.
- Reheating Chicken:
- Oven/Toaster Oven: This is the best method for reheating fried chicken to restore some crispiness. Preheat your oven or toaster oven to 375°F (190°C). Place the chicken pieces on a wire rack set over a baking sheet. Heat for 15-20 minutes, or until heated through and the skin is crispy again.
- Air Fryer: Preheat air fryer to 350°F (175°C). Place chicken in a single layer and air fry for 8-12 minutes, flipping halfway, until heated through and crispy.
- Microwave: While quick, the microwave will make the chicken soft and soggy. Only use if absolutely necessary, heating in short bursts until warm.
- Reheating Fries:
- Oven/Toaster Oven: Preheat to 400°F (200°C). Spread fries in a single layer on a baking sheet. Heat for 5-10 minutes, tossing halfway, until hot and crispy.
- Air Fryer: Preheat air fryer to 375°F (190°C). Place fries in a single layer and air fry for 5-8 minutes, shaking the basket frequently, until hot and crispy.
- Skillet: Heat a small amount of oil in a skillet over medium-high heat. Add fries and stir-fry for a few minutes until hot and crispy.
Frequently Asked Questions
Can I use boneless chicken for this recipe?
Yes, you can absolutely use boneless chicken pieces like chicken tenders or boneless thighs. The cooking time will be significantly shorter. For boneless tenders, the second fry might only take 3-5 minutes, ensuring they are cooked through but not overcooked and dry. Always use a meat thermometer to check for an internal temperature of 165°F (74°C).
What type of oil is best for deep frying?
For deep frying, it’s best to use oils with a high smoke point and neutral flavor. Vegetable oil, canola oil, and peanut oil are excellent choices. They can withstand the high temperatures required for frying without breaking down or imparting undesirable flavors to your food.
My chicken isn’t getting crispy, what am I doing wrong?
Several factors can lead to less-than-crispy chicken. The most common culprits are insufficient oil temperature (too low), overcrowding the pot (which drops the oil temperature), not drying the chicken thoroughly before coating, or not letting the coated chicken rest before frying. Ensure your oil is at the correct temperature, fry in small batches, pat your chicken very dry, and allow the coating to set for at least 15 minutes before frying.
Can I make the dipping sauce ahead of time?
Yes, the tangy dipping sauce can be made several days in advance. Store it in an airtight container in the refrigerator. In fact, making it ahead allows the flavors to meld and deepen, often resulting in an even more delicious sauce when serving.