Instructions
Prepare the Chicken Drumsticks:
- Dry Brine (Optional but Recommended): Pat the chicken drumsticks thoroughly dry with paper towels. Sprinkle generously with 1 teaspoon salt per 4 drumsticks and place them on a wire rack set over a baking sheet. Refrigerate uncovered for at least 4 hours, or preferably overnight. This step draws out moisture, leading to crispier skin.
- Prepare the Marinade/Coating: In a large bowl, combine the olive oil, smoked paprika, garlic powder, onion powder, dried oregano, cayenne pepper (if using), 1 teaspoon salt, and 1/2 teaspoon black pepper.
- Coat the Chicken: If dry brining, remove the chicken from the fridge and pat dry again. Add the drumsticks to the bowl with the spice mixture and toss until each drumstick is evenly coated.
- Flour Dredge (for Extra Crispiness): Sprinkle the 1/4 cup all-purpose flour over the coated drumsticks and toss again until lightly dusted. This creates a thin, crisp crust.
- Preheat Oven/Air Fryer:
- Oven Baking: Preheat your oven to 400°F (200°C). Line a baking sheet with parchment paper or foil and place a wire rack on top.
- Air Frying: Preheat your air fryer to 375°F (190°C).
- Cook the Chicken:
- Oven Baking: Arrange the drumsticks in a single layer on the wire rack, ensuring they don’t touch. Bake for 35-45 minutes, flipping halfway through, or until the internal temperature reaches 165°F (74°C) using a meat thermometer and the skin is deeply golden brown and crispy. For extra crispiness in the last 5-10 minutes, you can increase the oven temperature to 425°F (220°C) or briefly broil, watching carefully to prevent burning.
- Air Frying: Place drumsticks in a single layer in the air fryer basket, working in batches if necessary to avoid overcrowding. Air fry for 20-25 minutes, flipping halfway through, until the internal temperature reaches 165°F (74°C) and the skin is super crispy.
- Rest the Chicken: Once cooked, remove the drumsticks from the oven or air fryer and let them rest for 5-10 minutes before serving. This helps the juices redistribute, keeping the chicken tender.
Prepare the Homemade Fries:
- Prepare the Potatoes: Wash and peel the Russet potatoes. Cut them into 1/4 to 1/2-inch thick fries. For consistency, use a mandoline or a fry cutter if available.
- Soak the Potatoes (Crucial for Crispiness): Place the cut fries in a large bowl of very cold water. If desired, add 1/4 cup white vinegar to the water. Soak for at least 30 minutes, or up to 2 hours, changing the water once or twice if soaking longer. This removes excess starch, preventing sticking and promoting crispiness.
- Dry the Potatoes Thoroughly: This is a critical step! Drain the potatoes completely. Spread them out in a single layer on clean kitchen towels or paper towels and pat them absolutely, positively dry. Any remaining moisture will cause splattering and lead to soggy fries.
- First Fry (Blanching):
- Pour the vegetable oil into a large, heavy-bottomed pot or Dutch oven, filling it no more than halfway. Attach a deep-fry thermometer to the side.
- Heat the oil over medium-high heat to 325°F (160°C).
- Carefully add a single layer of dried fries to the hot oil, being careful not to overcrowd the pot. Fry for 5-7 minutes, or until the fries are soft, pale, and slightly translucent but not browned.
- Remove the fries with a slotted spoon or spider and transfer them to a wire rack set over a baking sheet to drain. Repeat with the remaining batches.
- Second Fry (Crisping):
- Increase the oil temperature to 375°F (190°C).
- Once the oil is at temperature, carefully return the blanched fries to the hot oil in batches.
- Fry for 3-5 minutes, or until deeply golden brown and perfectly crispy.
- Remove the fries from the oil and immediately transfer them to a clean wire rack lined with paper towels to drain excess oil.
- Season the Fries: While the fries are still hot, immediately transfer them to a large bowl. Sprinkle with salt, black pepper, and garlic powder, tossing gently to coat evenly. Taste and adjust seasoning as needed.
Prepare the Fresh Side Salad:
- Wash and Prepare Vegetables: Wash and dry the mixed greens. Slice the cucumber, tomato, and red onion. Chop the fresh parsley.
- Assemble Salad: In a medium bowl, combine the mixed greens, cucumber, tomato, and red onion.
- Make Dressing: In a small bowl, whisk together the olive oil, red wine vinegar, Dijon mustard, salt, and black pepper until emulsified.
- Dress and Serve: Just before serving, drizzle the dressing over the salad and toss gently to coat. Garnish with fresh chopped parsley.
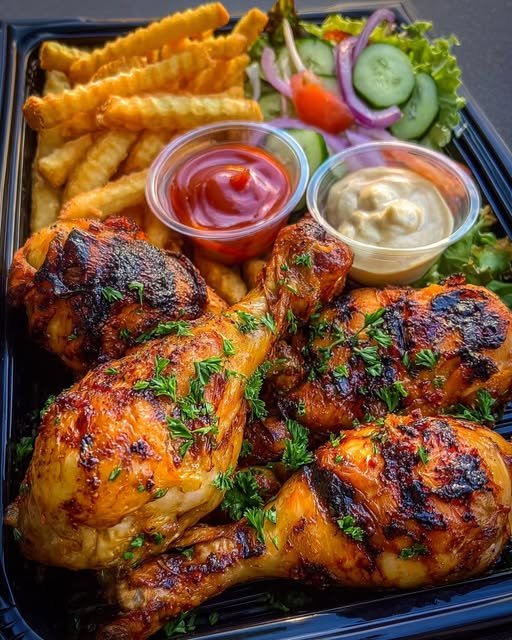
Assemble the Box:
Arrange the crispy chicken drumsticks, a generous portion of seasoned fries, and a serving of the fresh side salad in your preferred “box” or on a plate. Serve immediately with ketchup and garlic aioli on the side.
Cooking Tips and Variations
Key to Crispy Chicken: The absolute secret to crispy chicken skin is to ensure it’s as dry as possible before cooking. The optional dry brining step is highly recommended as it draws out moisture from within the skin, leading to an unparalleled crispness. If you’re short on time, at least pat the drumsticks vigorously with paper towels right before seasoning. Cooking at a high temperature, whether in the oven, air fryer, or even deep-frying, is also crucial. High heat helps render the fat under the skin quickly, creating that desirable crunchy texture. For oven baking, placing drumsticks on a wire rack allows air to circulate around all sides, preventing a soggy bottom.
Fries Perfection: Potato selection truly matters for fries. Russet potatoes are ideal because their high starch content and low moisture result in a fluffy interior and a crispy exterior. The double-frying method is non-negotiable for truly crispy fries. The first fry (blanching at a lower temperature) cooks the potatoes through and gelatinizes the starch, while the second fry (at a higher temperature) crisps them up and gives them that beautiful golden color. Soaking the cut potatoes in cold water, especially with a touch of vinegar, is another game-changer as it removes surface starches that can lead to sticking and limpness. Always pat your fries bone dry before frying to prevent oil splattering and ensure maximum crispiness.
Seasoning Tips: For the chicken, don’t be shy with your spice rub. A good blend of savory spices like paprika, garlic, and onion powder, along with a hint of heat from cayenne, creates a flavor explosion. Consider adding a touch of brown sugar to your rub for a beautiful caramelization and even crispier skin. For the fries, season them immediately after they come out of the oil while they are still hot. This allows the salt and other seasonings to adhere properly. Experiment with different seasonings like Cajun spice, rosemary and garlic, or even a sprinkle of Parmesan cheese for a gourmet touch.
Temperature Control: Always use a meat thermometer to ensure your chicken drumsticks reach an internal temperature of 165°F (74°C) for safe consumption. For deep-frying, a reliable deep-fry thermometer is essential to maintain the correct oil temperatures for both the blanching and crisping stages of the fries. Incorrect oil temperature can lead to greasy or soggy fries.
Resting Time: Allow the cooked chicken to rest for 5-10 minutes before serving. This allows the muscle fibers to relax and redistribute their juices, resulting in more tender and moist chicken. Skipping this step can lead to dry chicken, even if it was cooked perfectly.
Preheating: Whether you’re using an oven or an air fryer, always preheat it thoroughly to the specified temperature. Placing food in a cold oven or air fryer will negatively impact cooking time and crispiness.
Variations:
- Spice Rubs: Get creative with your chicken! Try a lemon-herb rub with lemon zest, rosemary, and thyme. For a spicier kick, a peri-peri inspired rub with chili powder, cumin, and oregano would be fantastic. A touch of curry powder can also add an interesting depth of flavor.
- Sweet Potato Fries: For a healthier twist, substitute Russet potatoes with sweet potatoes. Follow the same double-frying method, but note that sweet potato fries tend to brown faster due to their sugar content, so watch them closely.
- Dipping Sauces: Beyond ketchup and garlic aioli, consider a spicy sriracha mayo, a tangy honey mustard, a cool ranch dressing, or even a homemade barbecue sauce. A simple yogurt-dill dip can also provide a refreshing contrast.
- Salad Additions: Enhance the side salad with crumbled feta cheese, toasted nuts (like pecans or walnuts), croutons, or even some grilled corn for added texture and flavor. A balsamic glaze drizzled over the top would also be a nice touch.
- Air Fryer Fries: If you prefer to avoid deep-frying, you can air fry your potatoes. After soaking and drying, toss them with 1-2 tablespoons of oil and air fry at 375°F (190°C) for 15-25 minutes, shaking the basket frequently, until golden and crispy. While often healthier, the texture might be slightly different from deep-fried.
Storage and Reheating
Storage: Leftover crispy chicken drumsticks and fries are best stored separately to maintain their texture. Place the cooled chicken drumsticks in an airtight container and refrigerate for up to 3-4 days. Store the cooled fries in a separate airtight container or a paper bag (to absorb moisture) in the refrigerator for up to 2-3 days. The side salad, if dressed, is best consumed immediately. Undressed salad components can be stored separately in the refrigerator for 2-3 days.
Reheating: Reheating crispy foods can be tricky, as they often lose their crispness. The best way to reheat both the chicken and fries is in an oven or air fryer.
- Chicken Drumsticks: Preheat your oven to 375°F (190°C) or your air fryer to 350°F (175°C). Place the drumsticks on a wire rack set over a baking sheet (for the oven) or directly in the air fryer basket. Reheat for 10-15 minutes, or until heated through and the skin has re-crisped. Avoid microwaving, as this will make the skin soggy.
- Fries: For best results, spread the fries in a single layer on a baking sheet or in the air fryer basket. Reheat in a preheated oven at 400°F (200°C) for 5-8 minutes, or in an air fryer at 375°F (190°C) for 3-5 minutes, shaking halfway through, until hot and crispy. Again, avoid the microwave.
Frequently Asked Questions
What is the secret to getting really crispy chicken skin?
The absolute best way to achieve super crispy chicken skin is to start with very dry drumsticks. Pat them thoroughly dry with paper towels, and ideally, perform a dry brine by salting them and letting them sit uncovered in the refrigerator for several hours or overnight. This draws out moisture, which is the enemy of crispiness. Cooking at a high temperature (either baking, air frying, or deep frying) also helps render the fat and crisp up the skin effectively.
Can I make the fries ahead of time?
You can prepare the potatoes by cutting and soaking them in cold water up to 2 hours in advance. Make sure to drain and dry them thoroughly just before the first fry. While you can perform the first fry (blanching) a few hours ahead of time and store the blanched fries in the refrigerator, it’s always best to do the second, crisping fry just before serving for optimal texture. Reheating fully cooked fries will never be quite as good as freshly fried ones.
What kind of oil is best for frying the fries?
For deep frying, oils with a high smoke point are best. Vegetable oil, canola oil, peanut oil, or sunflower oil are all excellent choices. They can withstand the high temperatures required for frying without breaking down or imparting off-flavors. Avoid olive oil or butter, as they have lower smoke points and will burn.
I don’t have an air fryer. Can I still make crispy chicken and fries?
Absolutely! The recipe includes instructions for oven-baking the chicken, which yields fantastic crispy results, especially if you use a wire rack. For the fries, deep-frying is the traditional and arguably best method for achieving that classic crispy texture. The air fryer offers a convenient and slightly healthier alternative, but it’s by no means essential for a delicious outcome.