Instructions
- Prepare the Pie Crust Dough: In a large bowl, whisk together the flour and salt. Add the very cold, cubed butter to the flour mixture. Using a pastry blender, your fingertips, or a food processor, cut the butter into the flour until the mixture resembles coarse crumbs with some pea-sized pieces of butter remaining.
- Gradually add the ice water, 1 tablespoon at a time, mixing gently until the dough just comes together. Be careful not to overmix. Divide the dough in half, flatten each half into a disc, wrap tightly in plastic wrap, and refrigerate for at least 1 hour (or up to 2 days). This chilling is crucial for flaky crust.
- Pre-cook the Chicken (if not already cooked): If using raw chicken, poach or bake chicken breasts/thighs until cooked through. Shred or dice into bite-sized pieces and set aside.
- Start the Filling – Sauté Aromatics: In a large Dutch oven or heavy-bottomed pot, melt 2 tablespoons butter with 1 tablespoon olive oil over medium heat. Add the diced onion, carrots, and celery. Sauté for 8-10 minutes, stirring occasionally, until the vegetables begin to soften.
- Add Mushrooms and Garlic: Add the sliced mushrooms to the pot. Cook for another 5-7 minutes, stirring occasionally, until the mushrooms release their moisture and start to brown. Stir in the minced garlic and cook for 1 minute more until fragrant.
- Deglaze with Wine: Pour in the dry white wine, scraping up any browned bits from the bottom of the pot. Let the wine simmer and reduce by half, about 2-3 minutes.
- Make the Roux: Sprinkle the ½ cup all-purpose flour over the vegetables. Cook, stirring constantly, for 2 minutes to create a roux. This will thicken the sauce.
- Build the Sauce: Gradually whisk in the chicken broth, then the whole milk, ensuring no lumps form. Bring the mixture to a gentle simmer, stirring constantly, until the sauce thickens, about 5-7 minutes.
- Finish the Filling: Reduce the heat to low. Stir in the heavy cream, cooked chicken, thawed green peas, thawed corn kernels, fresh parsley, fresh thyme, salt, pepper, and nutmeg. Taste and adjust seasonings as needed. Remove the filling from the heat and let it cool slightly while you prepare the crust.
- Prepare the Pie Dish and Bottom Crust: Preheat your oven to 400°F (200°C). On a lightly floured surface, roll out one disc of chilled pie dough into a 12-inch circle. Carefully transfer the dough to a 9-inch pie dish. Trim the edges, leaving about a ½-inch overhang.
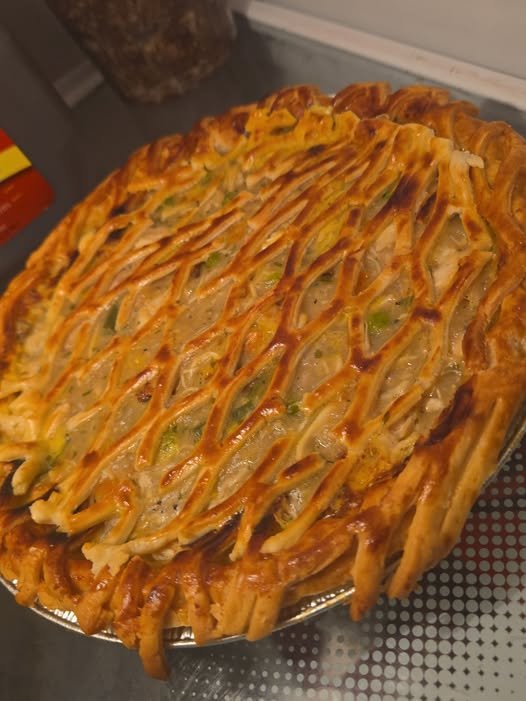
- Create the Lattice Top: Roll out the second disc of chilled pie dough into a 12-inch circle. Using a pastry wheel or sharp knife, cut the dough into 1-inch wide strips.
- Carefully arrange half of the strips parallel across the top of the pie filling. Fold back every other strip. Place a perpendicular strip over the unfolded strips. Unfold the original strips over the new strip. Repeat the process, folding back the alternate strips, placing a new perpendicular strip, and unfolding. Continue until the entire top is covered in a woven lattice pattern.
- Trim the excess lattice strips and crimp the edges of the top and bottom crusts together to seal. You can create a decorative edge by fluting with your fingers or a fork.
- Egg Wash and Vent: Lightly brush the entire lattice top with the beaten egg wash. This will give it a beautiful golden sheen. If not making a lattice, cut a few small slits in the top crust to allow steam to escape.
- Bake the Pie: Place the pie on a baking sheet to catch any potential drips. Bake for 20 minutes at 400°F (200°C).
- Reduce Temperature and Continue Baking: Reduce the oven temperature to 375°F (190°C) and continue baking for another 30-40 minutes, or until the crust is deeply golden brown and the filling is bubbling. If the crust starts to brown too quickly, loosely tent the edges with aluminum foil.
- Cool Before Serving: Once baked, remove the pie from the oven and let it rest for at least 15-20 minutes before slicing and serving. This allows the filling to set and prevents it from being too runny.
Cooking Tips and Variations
Achieving the perfect chicken pie involves a few key techniques. For the crust, remember that cold butter is your best friend. Work quickly to prevent the butter from melting, as those tiny pockets of butter are what create the flaky layers when baked. If your kitchen is warm, you can even chill your flour beforehand. Don’t overmix the dough; a tender crust comes from minimal handling. When rolling out the dough, use just enough flour to prevent sticking. If the dough becomes too warm or difficult to handle, pop it back into the fridge for 10-15 minutes.
For the filling, ensuring the vegetables are properly softened but not mushy is crucial for texture. Sautéing them in butter and olive oil adds depth of flavor. The white wine deglaze is a small but mighty step, adding acidity and complexity that brightens the rich sauce. When making the roux, cook the flour for a couple of minutes to eliminate the raw flour taste; this is key for a smooth, delicious sauce. Gradually whisking in the liquids prevents lumps and ensures a silky consistency. Don’t be afraid to taste and adjust seasonings throughout the process; every palate is different. A pinch of nutmeg might seem unusual, but it subtly enhances the creamy, savory notes of the filling.
If you’re short on time, using store-bought puff pastry for the top crust can be a fantastic shortcut, offering a different but equally delicious flakiness. For an even quicker chicken pie, consider using a rotisserie chicken. Simply shred the meat and add it to your pre-made sauce. This saves a significant amount of cooking time for the chicken itself. Vegetable variations are endless: feel free to add potatoes, leeks, spinach, or green beans. Just ensure any harder vegetables are pre-cooked or diced small enough to cook through in the pie. For a richer, deeper flavor in the filling, you could use chicken thighs instead of breasts, or a combination of both. If you prefer a thicker saucier filling, you can always reduce the amount of milk or broth slightly, or let the sauce simmer a bit longer to evaporate more liquid. For a creamier finish, a dollop of cream cheese or a tablespoon of Dijon mustard can be stirred into the filling at the end for an extra layer of richness and tang. If you’re not a fan of wine, you can simply omit it and use an extra ½ cup of chicken broth, though you might miss a slight depth of flavor. To make it a vegetarian pie, simply substitute the chicken with chickpeas, cannellini beans, or extra mushrooms and vegetables, and use vegetable broth instead of chicken broth. For a gluten-free version, use a gluten-free all-purpose flour blend for both the crust and the roux in the filling, ensuring the blend includes xanthan gum for structure.
Storage and Reheating
To store leftover chicken pie, allow it to cool completely to room temperature. Once cooled, cover the pie dish tightly with plastic wrap or aluminum foil. It can be stored in the refrigerator for up to 3-4 days. You can also transfer individual slices to airtight containers for easier portioning and storage. For longer storage, chicken pie freezes exceptionally well. Once completely cooled, you can wrap the entire pie (or individual slices) in several layers of plastic wrap and then a layer of aluminum foil. Label with the date. Frozen chicken pie can maintain its quality for up to 2-3 months. Thaw frozen pie overnight in the refrigerator before reheating.
For reheating, preheat your oven to 350°F (175°C). If reheating a whole pie, cover it loosely with aluminum foil to prevent the crust from over-browning. Bake for 20-30 minutes, or until the filling is hot and bubbling and the crust is crisp again. For individual slices, you can reheat them in the oven for about 15-20 minutes, or in a microwave for 2-3 minutes until heated through. Be aware that microwaving will soften the crust, so the oven is always the preferred method for maintaining crispness. If reheating in the oven, you can remove the foil for the last 5-10 minutes to help re-crisp the top crust. Always ensure the internal temperature of the pie reaches 165°F (74°C) for safe consumption.
Frequently Asked Questions
Can I make the pie crust and filling ahead of time?
Absolutely! The pie crust dough can be made up to 2-3 days in advance and stored in the refrigerator, or frozen for up to 3 months. Thaw in the refrigerator before rolling. The chicken filling can also be prepared 1-2 days ahead of time and stored in an airtight container in the refrigerator. Make sure to cool it completely before storing. When ready to bake, simply assemble the pie with the pre-made components and proceed with the baking instructions.
How do I prevent a soggy bottom crust?
Several factors contribute to a soggy bottom crust. Firstly, ensure your filling isn’t too wet; allow it to cool slightly before adding to the crust, as steam from a hot filling can make the bottom soggy. Secondly, a very cold pie dough for the bottom crust helps. Lastly, a hot oven and baking the pie on a lower rack can help cook the bottom crust more effectively. Some bakers even blind-bake the bottom crust for 10-15 minutes before adding the filling, especially if the filling is particularly moist. Using a metal pie dish over ceramic can also help conduct heat more efficiently to the bottom crust.
What’s the best way to get a perfectly golden-brown lattice crust?
The key to a beautiful golden-brown lattice crust is the egg wash. A simple beaten egg (or egg yolk mixed with a tablespoon of water or milk) brushed evenly over the entire top crust before baking will give it a rich, shiny, golden finish. Ensure your oven temperature is accurate and rotate the pie halfway through baking if you notice uneven browning. If the crust starts to brown too quickly before the filling is fully heated, loosely tent the edges or the entire pie with aluminum foil.